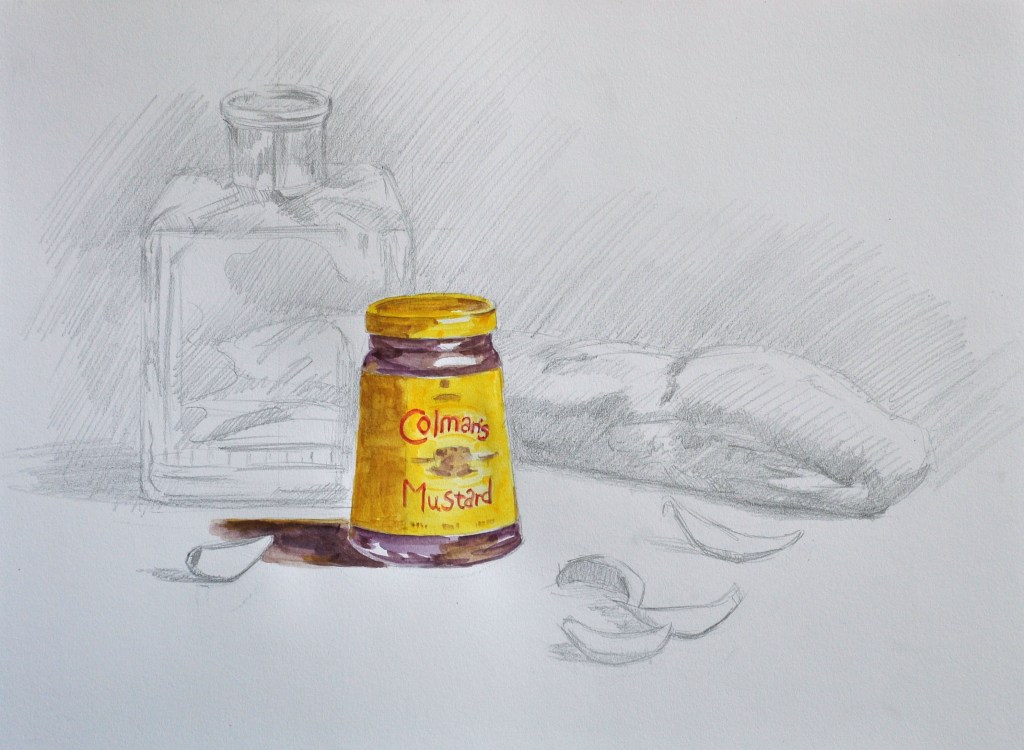
Project 3- Colored Object within a Monochrome Setting, Part II
Today we will continue our work on Project 3. In the last lesson we set the composition of our still-life. We then, focused on the monochrome objects that will anchor our colored object within the composition. Getting the drawing correct by using strategies and comparisons. We then mapped out out light and shadow patterns and began to fully render our objects. Today, I will go over how to proceed with the colored object- hot sauce, Italian tomato can, Goya coconut milk etc. We will refer to our study to help us. This object should already be placed within our still-life.
Assignment
In this lesson, we will focus on the watercoloured object you have chosen as your Point of Focus in the composition.
Materials:
- The colored object- hot sauce, tomatoes, Goya product, mustard, Latino food etc. with a nicely colored label.
- 2-3 other objects to create the setting. These can be any color, but we will render them in black, gray and white only in pencil using our pencil techniques.
- 11 x 14 Multi-media pad.
- Pencil set, Drawing I
- Gum eraser
- Sharpener
- Watercolor set
- Brush with set
- Water in container
- Paper towels
Instructions:
- Looking at your composition reflect on what creates a focal point.
- Now, we should have most of our objects rendered in HB pencil, indicating the form and cast shadows. Use our comparisons and strategies to render these objects correctly. We should have most of the values rendered on these monochrome objects. They should have a feeling of completeness.
- Let us look at the main object: take out the 3 colors that you have chosen to render this object. Such as Red, Green, Yellow.
- Lay in the lightest colors first, carrying these into what will be the shadow area. Let this thoroughly dry before the next step.
- To render the shadows, we will choose a color to glaze over the shadow with. In the case of the colors above, I may use green with a touch of red to neutralize it. I will thinly, with water, lightly glaze the shadow pattern over the first colors I laid in. Do this simply without a lot of fuss. If you work the area too much it will raise the first colors that you laid in and ruin the effect.
- Use the same shadow color glaze in the cast shadow on the table. You may need to darken this slightly- use a little less water.
- If you need to review how to do this step, look at my earlier lesson on watercolouring the central object: “Study of Colored Object”
Upload progress to this assignment section.
Due: