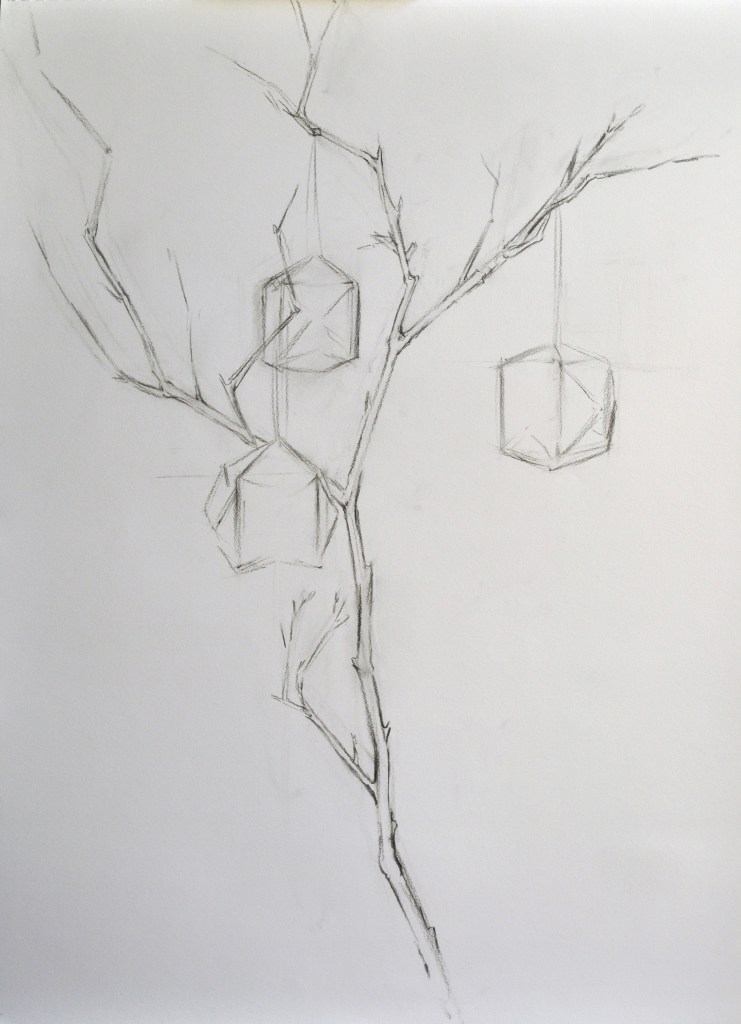
Origami and Branch (Project 1)
Our first Project will cover linear design using the strategies we have learned and effectively using comparisons to self-correct one’s work. In this project we will place at least 3 origami forms on a branch from a tree. These forms will be placed around the branch so that they appear at different levels as well as at different depths from the picture plane. In this lesson I will demonstrate how to arrange the set-up and to begin our drawing.
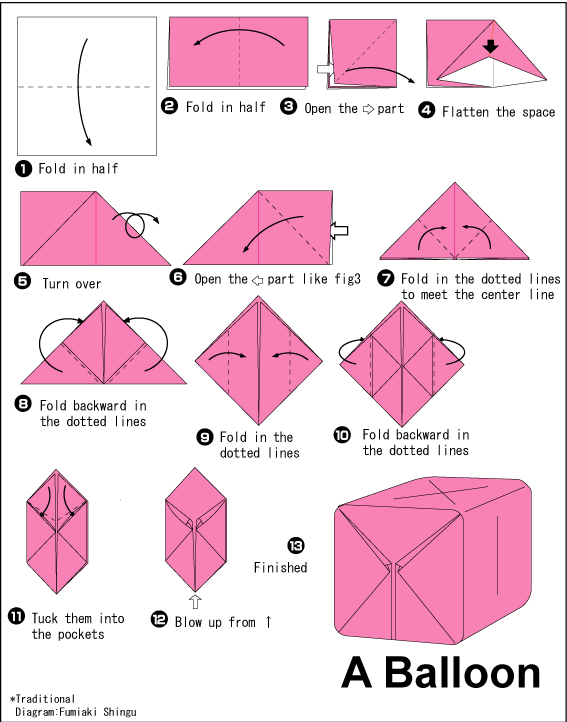
Origami Directions- Make 3 Balloons
Assignment
Materials:
- 18 x 24 pad
- Charcoal
- Sandpaper pad
- Rag
- Comparison stick
- Kneaded eraser
- 3 Origami forms
- Branch from a tree with a container to hold branch upright. Take the leaves off or you may leave 2-3 leaves to add to the interest of the composition.
Assignment: Create a drawing of the origami forms and the branch using strategies and comparisons
Place your branch in a vase or container so that it is perfectly upright. Place origami forms at different levels and depths along the branches. You can use string to hang them or they can be placed directly on a branch. The goal is to compare one origami form against another using our strategies for drawing and then adjusting the forms through the method of comparisons. Do not draw the container. You can always draw the branch further down as if you can see through this container.
Upload image of finished drawing to the assignment section only after you have completed the second lesson on this project.
T/TH, Due:
M/W, Due: